What Does a Good Child Self-Tape Audition at Home Actually Require?
A strong child self-tape audition at home needs three non-negotiables: clear, even light on the child’s face; clean audio with no echo or background noise; and a neutral, distraction-free background. Everything else, including camera brand and editing software, is secondary. Most SGV families already have what they need in the house. The setup steps below apply whether your child is auditioning for a local Arcadia theater production, an LA commercial, or a regional TV callback.
How Do You Set Up the Room for a Kids’ Self-Tape?
Choose a small, quiet room with a plain wall. A light grey wall works across all skin tones and is the industry standard for neutral backgrounds. If your wall is white, hang a grey sheet or buy an inexpensive grey paper backdrop roll. Avoid patterned wallpaper, busy bookshelves, or anything with text visible behind the child.
- Lighting: Position a large window to the side or slightly in front of the child, never behind. Overcast daylight is ideal. If you shoot at night, use two soft LED panels angled at 45 degrees on either side of the child’s face. Avoid single overhead lights, which create harsh shadows under the eyes.
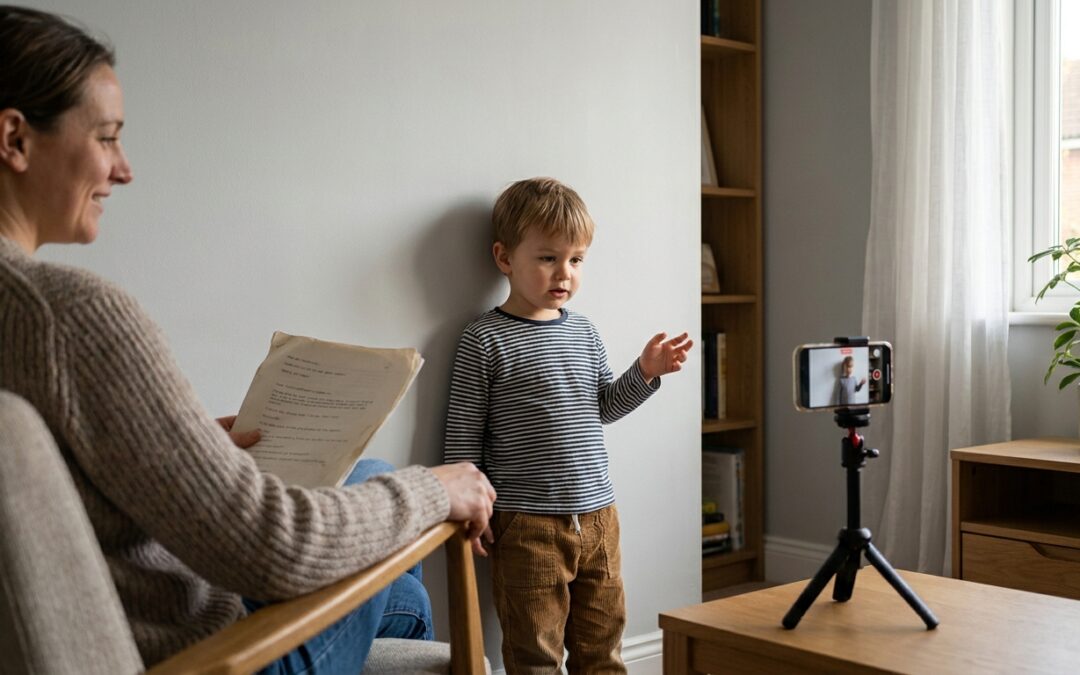
- Camera position: Mount your phone or camera on a tripod at the child’s eye level. Film in landscape (horizontal) orientation only. Frame a medium close-up: head, shoulders, and a few inches of chest. This lets casting directors read facial expressions clearly.
- Audio: Plug in a lavalier or directional microphone if you have one. If not, move the phone closer than you think necessary, roughly 3–4 feet from the child. Record a 10-second test clip and play it back through headphones before any real takes. Room echo is the most common audio failure parents miss.
- Background check: Scan the frame before every session for stray laundry, open doors, or windows showing traffic outside.
What Should a Child Wear for a Self-Tape Audition?
Wardrobe is simpler than most parents think. The goal is to keep the casting director’s eye on the child’s face, not their outfit.
| Wear | Avoid | Why |
|---|---|---|
| Solid mid-tone colors (navy, teal, soft green, dusty rose) | Solid bright white | White overexposes and “blooms” on camera |
| Subtle textures (light knit, cotton) | Solid black | Black flattens depth and contrast |
| A comfortable, age-appropriate outfit the child likes | Solid red or neon tones | Red bleeds color on most cameras |
| The same outfit for callbacks (consistency builds recognition) | Logos, stripes, or busy prints | Patterns distract and create visual noise |
Let your child wear something they feel good in within these rules. Confidence reads on camera, and a child who likes their “lucky outfit” will perform more naturally than one who was dressed purely for optics.
Who Should Be the Reader, and How Should They Do It?
The reader delivers the other character’s lines so your child has something real to respond to. This is one of the most under-coached elements of a home self-tape and one of the most common failure points.
- Position: The reader sits or stands directly beside the camera lens, just out of frame. The child looks toward the reader, which keeps their eyeline close to the lens without looking straight into it.
- Volume: The reader must be noticeably quieter than the child. Casting directors are evaluating the child, not the reader. If a parent’s louder voice dominates the audio, the child’s performance gets buried.
- Pace and tone: Read lines at a neutral, steady pace. Do not perform or compete. Give the child the cue they need, then get out of the way.
- An adult must always be present when a performer under 18 is filming a self-tape or participating in an online audition. This is both a child online-safety standard and California best practice.
How Do You Help a Younger Child Nail Their Self-Tape Performance?
Memorization is only half the job. A child who recites lines without understanding what their character wants will look flat on camera. Before filming:
- Read through the scene together and ask: “What does your character want here? How do they feel?” Use simple language for younger kids.
- Do a full run-through the night before, not the morning of, to let the lines settle into long-term memory.
- On filming day, warm up with a game or a quick improv exercise to loosen nerves. If the child freezes or gets frustrated, use the three-takes-then-break rule: after three attempts, stop for a snack, a stretch, or a short walk, then return. Pushing past exhaustion produces worse takes, not better ones.
- Watch the first take back together on a screen large enough to see facial expressions clearly.
This approach mirrors what students practice in our on-camera acting classes for kids in Arcadia, where scene objective work and camera confidence are built over time rather than crammed before a deadline.
How Do You Slate a Self-Tape for a Child Actor?
The slate is the brief introduction at the start of the tape. Keep it short, warm, and direct. The child looks into the lens and says: their name, age, and the role they are auditioning for. Some breakdowns also ask for height. Coach the child to deliver the slate as naturally as possible, a slate that looks rehearsed to within an inch of its life signals nerves. Practice it conversationally at home the same way you would practice introducing yourself at a new school.
At Home vs. Paid Studio: Which Is Right for Your SGV Child Actor?
LA self-tape studios typically charge $40–$70 per half-hour session, including basic editing and a final file, with hourly rates for a dedicated reader and editor running $75 and up. That is the benchmark your home setup needs to beat, or the threshold at which a studio becomes worth it.
| Factor | Film at Home | Book a Studio |
|---|---|---|
| Cost per session | Near zero after one-time gear | $40–$75+ per half-hour (LA rates) |
| Turnaround time | You control it | Same day or within a few hours |
| Child comfort | High, familiar environment | Variable, new setting can spike nerves |
| Professional reader | Parent or trusted adult | Trained actor-reader included |
| CA compliance (CPS permit) | N/A for a home parent session | Verify the studio holds a valid permit |
| Best for | First tapes, callbacks, frequent auditions | High-stakes network/studio auditions |
A California-specific compliance note: any professional who charges a fee to provide self-tape or coaching services to a minor in CA must hold a Child Performer Services (CPS) permit, which requires a criminal background check through the state Labor Commissioner’s Office. When you evaluate any paid studio or coach serving Arcadia, Temple City, Pasadena, Monrovia, or surrounding SGV cities, ask to see their CPS permit before booking. Parents can search current permit holders directly through the CA Department of Industrial Relations.
How Do You Deliver the Finished Self-Tape File?
- Format: Export or convert the video to MP4. Most casting platforms, including Actors Access and Casting Networks, require MP4.
- File name: Use the format: ProjectTitle_ChildFirstLastName. Example: SummerCommercial_EmmaLee.mp4. Never leave the file as a generic phone-generated name like IMG_4832.
- File size: Compress if the file is over 500 MB. Free tools like HandBrake handle this without visible quality loss at standard audition bitrates.
- Online safety: Only upload files to the casting platform specified in the breakdown. Do not post self-tapes to public social media. Confirm any email recipients before sending, especially for an under-18 performer.
Common Mistakes to Avoid
- Filming in portrait (vertical) mode, always use landscape.
- Reader volume louder than the child’s, the child must dominate the audio.
- Shooting with a window or lamp behind the child, backlight silhouettes the face.
- Putting the child in solid white, solid black, or bright red clothing.
- Skipping the audio test clip, echo and hum ruin otherwise good takes.
- Pushing for more takes past fatigue, three takes, then a break.
- Sending files without renaming them or converting to MP4.
- Using a paid studio or coach in California who cannot produce a valid CPS permit.
Frequently Asked Questions
What camera do I need to film a child self-tape audition at home?
A recent-model smartphone is sufficient. Most casting directors care far more about lighting and audio quality than camera brand. Use the rear camera (not the selfie camera), lock the exposure, and mount the phone on a tripod at the child’s eye level.
How long should a child’s self-tape be?
Follow the breakdown instructions exactly. If no length is specified, the full scene plus slate should typically run under two minutes. Casting directors watch many tapes in sequence; shorter is almost always better when the performance is strong.
Should my child look directly into the camera for a self-tape?
No, unless the breakdown specifically requests a direct-address style. In a scene, the child looks toward the reader, who is positioned just beside the camera. This keeps the eyeline close to the lens without breaking the fourth wall awkwardly.
When should we book a paid LA self-tape studio instead of filming at home?
Consider a studio for high-stakes network or major studio auditions where professional editing and a trained reader matter most. For routine submissions, callbacks, and first tapes, a well-lit home setup saves the $40–$75+ half-hour studio cost and keeps your child in a comfortable environment.
Do I need to be in the room while my child films a self-tape at home?
Yes. A parent or trusted adult should always be present when a minor is filming a self-tape or participating in any online audition. This is both a child online-safety standard and consistent with California’s child performer protections for any professional setting.
If your child is building toward auditions and needs structured on-camera confidence, explore our musical theater audition prep program for kids in Arcadia and the San Gabriel Valley, where scene work, camera awareness, and slate practice are part of every session.